
Hello, and welcome (back). In one of my previous examples, I showed you how to upload images to your vue app in an easy way. But sometimes you do not only want to upload images, but you also want to transform them to fit, for example in a predefined box.
To accomplish this I will make another component where the user could adjust the image to fit your needs. All this will happen using a library called vue advanced cropper, and they hold what the name promises. So let's get started!
How to crop images in vue?
To crop images in vue you can use an awesome package called vue-image-cropper. You just need to first upload an image and pass it to the component, then execute its crop method and save the result. Done!
I packaged everything to know about vue image cropper for you in a three stepped guide.
Step 1: Install vue advanced cropper
npm install -S vue-advanced-cropperStep 2: Building the Image Cropper Component
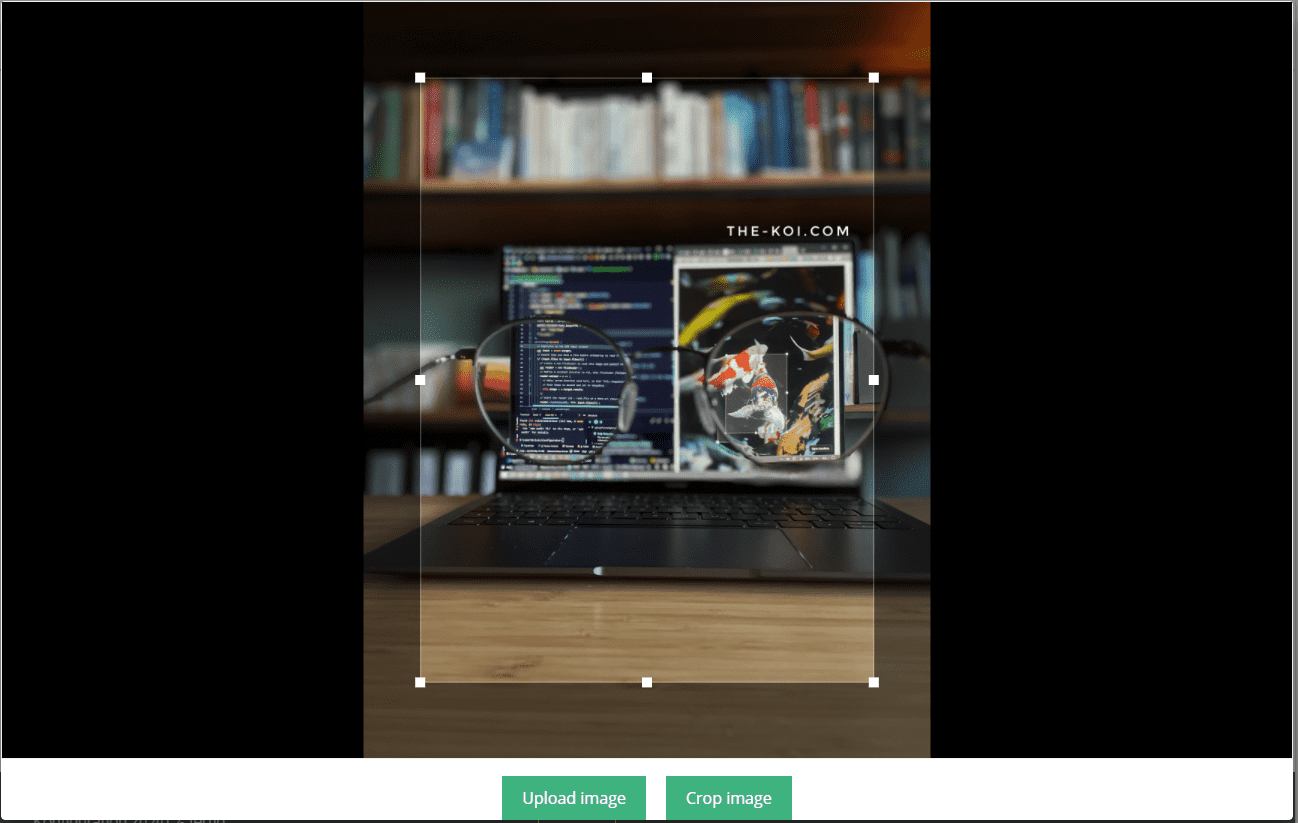
Here is the vue template for this vue-advanced-cropper example:
<cropper
        ref="cropper"
        class="example-cropper"
        :src="image" />
// to upload an image
// you can also use an primitive html input
<drop-zone
          v-model="image"
          :label="upload"
          :location="location"
          @uploaded="newImagesUploaded"
          class="pb-15"
        />
To crop your images you first need to import the image cropper component like any other component and its CSS.
    import { Cropper } from "vue-advanced-cropper";
    import "vue-advanced-cropper/dist/style.css";
    export default {
      name: "vueImageCropperExample",
      components: {
        Cropper
      },
      ...
As an image source, you can use everything you want, also our elegant drag&drop component from this tutorial.
Then give the cropper a reference. Optionally you can add some styling to the cropper component as I did with the example-cropper class.
You can also add other themes to the cropper, just import the wished CSS file into your component.
Step 3: Cropping images and saving the result
      methods: {
        cropImage() {
          const result = this.$refs.cropper.getResult();
          const newTab = window.open();
          // for testing open the result in a new tab
          newTab.document.body.innerHTML = `<img src="${result.canvas.toDataURL(
            "image/jpeg"
          )}"></img>`;
        }
      }
    };
To crop your images in vue use this.$refs.cropper.getResult();
This will access the cropper component and get the cropped image out of it!
I do this in the crop images method shown below. After getting the image out of vue-advanced-cropper I save it and for validation, I also open it in a new tab. I removed this before I committed this feature.
That's it! In the Documentation, there are many ways to extend your cropper to fit exactly your requirements!
Implementing this should take just some minutes and you will end up with a functional and elegant vue image crop component.
Below you can find the complete code for this vue advanced cropper example, feel free to copy and use it!
<template>
    <v-card width="auto">
      <div class="example">
        <cropper ref="cropper" class="example-cropper" :src="image" />
        <drop-zone
          v-model="image"
          :label="upload"
          :location="location"
          @uploaded="newImagesUploaded"
          class="pb-15"
        />
        <div class="button-wrapper">
          <span class="button" @click="cropImage">Crop image</span>
        </div>
      </div></v-card
    >
  </template>

    <script>
    import { Cropper } from "vue-advanced-cropper";
    import "vue-advanced-cropper/dist/style.css";
    export default {
      name: "vueImageCropperExample",
      components: {
        Cropper
      },
      props: {},
      data() {
        return {
          image:
            "https://images.pexels.com/photos/4218687/pexels-photo-4218687.jpeg?auto=compress&cs=tinysrgb&dpr=2&h=650&w=940"
        };
      },
      methods: {
        cropImage() {
          const result = this.$refs.cropper.getResult();
          const newTab = window.open();
          // for testing open the result in a new tab
          newTab.document.body.innerHTML = `<img src="${result.canvas.toDataURL(
            "image/jpeg"
          )}"></img>`;
        }
      }
    };
    </script>

    <style>
    .example-cropper {
      border: solid 1px #eee;
      min-height: 300px;
      width: 100%;
      height: 85vh;
    }

    .button-wrapper {
      display: flex;
      justify-content: center;
      margin-top: 17px;
    }

    .button {
      color: white;
      font-size: 16px;
      padding: 10px 20px;
      background: #35b392;
      cursor: pointer;
      transition: background 0.5s;
      font-family: Open Sans, Arial;
      margin: 0 10px;
    }

    .button:hover {
      background: #38d890;
    }

    .button input {
      display: none;
    }
    </style>
Optional Step 4: Upload images to an API using Axios
When cropping is done, you may want to upload your cropped Images to an API.
The easiest way to upload those Images is using Axios. Axios is an amazing JavaScript networking library every frontend developer should know. There are versions for all major frontend frameworks, so also for Vue.
To upload our Images using Axios we simply access the result and transform it to a Blob (binary large object). We are creating our blob out of the canvas element from the image cropper. Make sure to specify the correct file format for saving the blob at the bottom! I like to use png. We then pass this blob to a formData object with some additional parameters. This blob could then be sent to your API or to an S3 bucket or where ever you want to save it!
const { canvas } = this.$refs.cropper.getResult();
      if (canvas) {
        const formData = new FormData();
        canvas.toBlob(async blob => {
          formData.append(
            "File",
            blob,
            "myImageName.png"
          );
          // add optional stuff like an path to save the image
          formData.append("path", "/theKoiIsAwesome");
          // You can use axios, fetch and other libraries instead here
			let config = {
            headers: {
              "Content-Type": "multipart/form-data"
            }
          };
          let res = axios.post(`${ImageResource}`, formData, config);
          console.log("[save bg img]", result);
          // Perhaps you should add the setting appropriate file format here
        }, "image/png");
      }
If you also want to do some image processing server-side and then upload it to S3 you can follow my guide to Upload Images to S3 from a .net core API here.
Conclusion
Vue advanced cropper is an amazing library to easily build a bullet-proof image crop functionality for your vue project. This library is not only easy to use, but it is also highly extendable and customizable. The documentation is also very easy to follow with many examples.
If you have a .net backend I show you here how to save your cropped image to AWS S3.
Note: This is no affiliate, this is pure enthusiasm!
I hope I could help you and saved you some time, if you got feedback just contact me in the say hi section. If I could help you, you can support me by buying me a coffee.
Happy coding,
Alex