

This is the last part of my series on how to Upload files on Amazon S3 from a Vue.Js frontend. In the last part, we have uploaded our files from a .net core API. You can find it here if you missed it.
Once the files are uploaded the next requirement is to access them. There are several ways to access your files from an S3 bucket. You could either set everything to the public, which I do not recommend as you may already know and access them directly with your bucket URL + location + key. But:

The next option would be using the AWS Client SDK to generate signed URLs and access the images in that way, this is very safe but very slow and you would need IAM user credentials on your client-side. Another way is using presigned URLs, this is a safe and faster way. But even faster is accessing your images through Amazon CloudFront. If you later still want to improve security, you should definitely use resigned URLs generated by your API to access CloudFront.
Amazon CloudFront is a fast content delivery network (CDN), made to serve your content in a fast and secure way from all over the world. This keeps your latency low and your users safe. The best thing about it is, it is amazingly cheap, according to amazon by the day of writing, 10 TB of data out per month will cost you about 0.085 € So let's dive into it!
Setting up a CloudFront Distribution
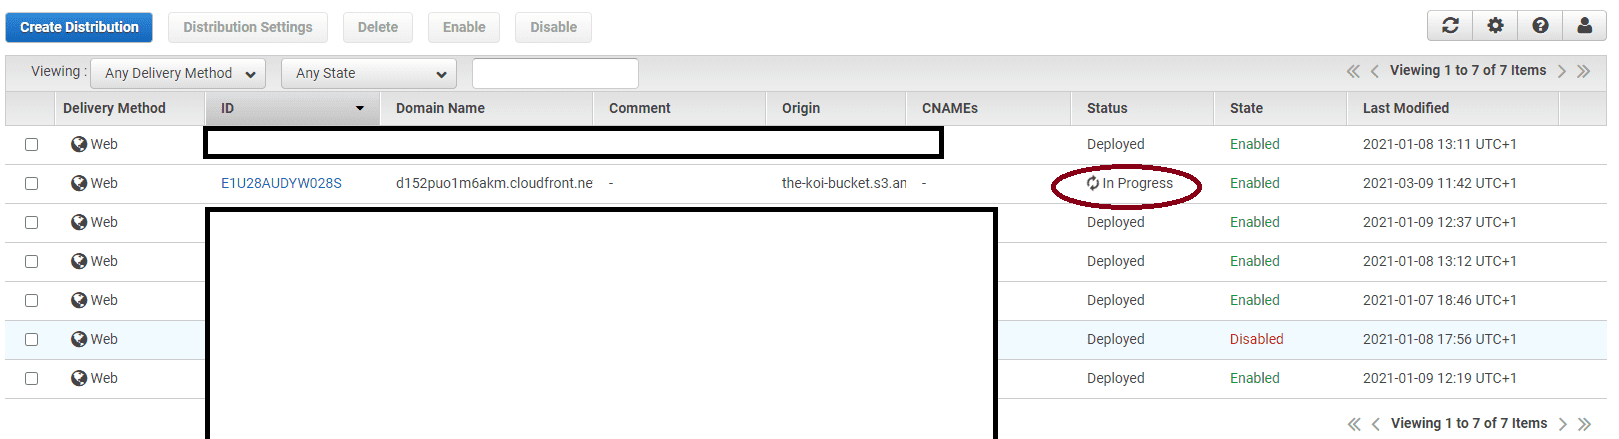
Go to your AWS console and chose CloudFront, then you will see a list of your Distribution. A Distribution is a setup CDN. The two Interesting columns for you would be the Domain Name and the origin. The Origin is the service CloudFront is forwarding, so this should be your S3 Bucket when we are done.
The other important column for you is the Domain Name, this is the URL from where you can access your images. Your final image URL then is Domain Name + location + filename.
To set up a new Distribution click on Create Distribution, chose Web as the delivery method, and click Get Started.
Origin Domain Name is your S3 Bucket created in Part 2, optionally you could also specify a path, this would be a folder inside your Bucket. Default CloudFront is accessing the home directory of your Bucket.
Select restrict Bucket access, Create new Identity and Yes, Update Bucket Policy. Then AWS will handle everything to make sure there are just Authenticated requests allowed to S3 and CloudFront is the only endpoint to get your files from.
To further improve security chose HTTPS Only, this leads to a set HSTS Header and drops all HTTP headers. Also allow only Get, Head and Options. Chose to restrict viewer access No, we will do that in one of my next Articles.
The rest you can set according to your personal preferences. I would also recommend logging, therefore you can just choose a Bucket for your logs and a file prefix to easily find them.
Below you can see my example Configuration:

After submitting your Distribution is going to be created. You can go back to the Overview and check the Status, after successful creation it should switch to deployed.
Then we can verify that the distribution works as expected.
Access the Uploaded image through Distribution
I've uploaded the title image of this article to S3, to check if everything works fine we now need to build the URL to this image with the file name: Datei_000.jpeg.
To Access your image you now need to build your URL:
https://
This would be for my Image:
https://d152puo1m6akm.cloudfront.net/Datei_000.jpeg
If your access is only with HTTP you will receive a 403 error since HTTP is not allowed.
Conclusion
Accessing your images via CloudFront is an easy way to improve the loading performance of your project since it is faster than accessing S3 directly. Moreover, it is a good way to improve the security since you can force using HTTPS and restricting to different headers way easier than directly in S3.
This was the last part of my S3 series, I hope I could help you, and let me know in the say Hi section how you've liked it or if you were facing any difficulties during this article. I'm looking forward to your feedback.
If you liked my articles you can support me.
Happy coding,
Alex.