
GoogleMaps is awesome, but the GoogleMaps API is even more Awesome. You can not only show places or calculate routes but you're also able to draw on the map, measure distances and even use heatmaps for data visualization.
Let´s get started by creating an API Key.
Creating an API key
GoogleMaps is not a free service, so before you can get access to it, you have to sign up for an API Key.
For this go to the google cloud developer console create an account and a project if you don't have it already, and then go to APIs and Credentials. From there, under create credentials, you can create new API Keys to use in your apps. Next, you add permissions to your keys.
For this navigate to library, and chose all the libraries you want to get access to.

Just make sure to check the prices before selecting one of those.
Then you also have to set up billing for your account and you are ready to move on.
Integrating Google maps in vue
I have tried several ways, starting from this vue tutorial, where I got a Nuxt error. To the vue2-google-maps library, where I found out that using the Maps APIs is really a pain. So I started to try to implement the vanilla js way into vue, after some problems later on I found a really nice npm package that handles all the stuff for me. The Google maps loader handles all the connection stuff for you and makes sure everything is set up!
Now the only task is loading google maps where it should load and define additional libaries. I've done this below.
<template>
  <v-container fluid>
    <div id="map"></div>
  </v-container>
</template>

<script>
import { Loader, LoaderOptions } from "google-maps";
const options = { libraries: ["drawing"] };
const loader = new Loader("yourKeyHere", options);

export default {
  name: "googleMaps",
  mounted: async function() {
    const google = await loader.load();
    const map = new google.maps.Map(document.getElementById("map"), {
      center: { lat: 47.076668, lng: 15.421371 },
      zoom: 20
    });
  }
};
</script>

<style scoped>
#map {
  position: absolute;
  left: 0;
  right: 0;
  top: 0;
  bottom: 100px;
  padding-bottom: 10px;
}
</style>
Above I have imported the loader and the loader options from the npm package.
Then I create a new Loader instance by passing my API key and my options to the Loader. In the options I have defined a library, I want to use later on.
In The mounted, google maps will be loaded and the map will be inserted into the map div from above. The map will get initial coordinates and an initial zoom, which is on house level.
Then I have just added some styling to make the map appear inside my component as I want it to. If you skip this the map might not be visible.
Using a Libary
Next, I want to show you how to use libraries within this approach.
You can find all the available libraries and examples on how to use them on Google Developer docs. I want to use the drawing library as an example.
mounted: async function() {
const google = await loader.load();
const map = new google.maps.Map(document.getElementById("map"), {
center: { lat: 47.076668, lng: 15.421371 },
zoom: 20
});
// add drawing menu
const drawingManager = new google.maps.drawing.DrawingManager({
drawingMode: google.maps.drawing.OverlayType.MARKER,
drawingControl: true,
drawingControlOptions: {
position: google.maps.ControlPosition.TOP_CENTER,
drawingModes: [
google.maps.drawing.OverlayType.POLYGON,
google.maps.drawing.OverlayType.POLYLINE,
google.maps.drawing.OverlayType.RECTANGLE
]
},
circleOptions: {
fillColor: "#ffff00",
fillOpacity: 1,
strokeWeight: 5,
clickable: false,
editable: true,
zIndex: 1
}
});
drawingManager.setMap(map);
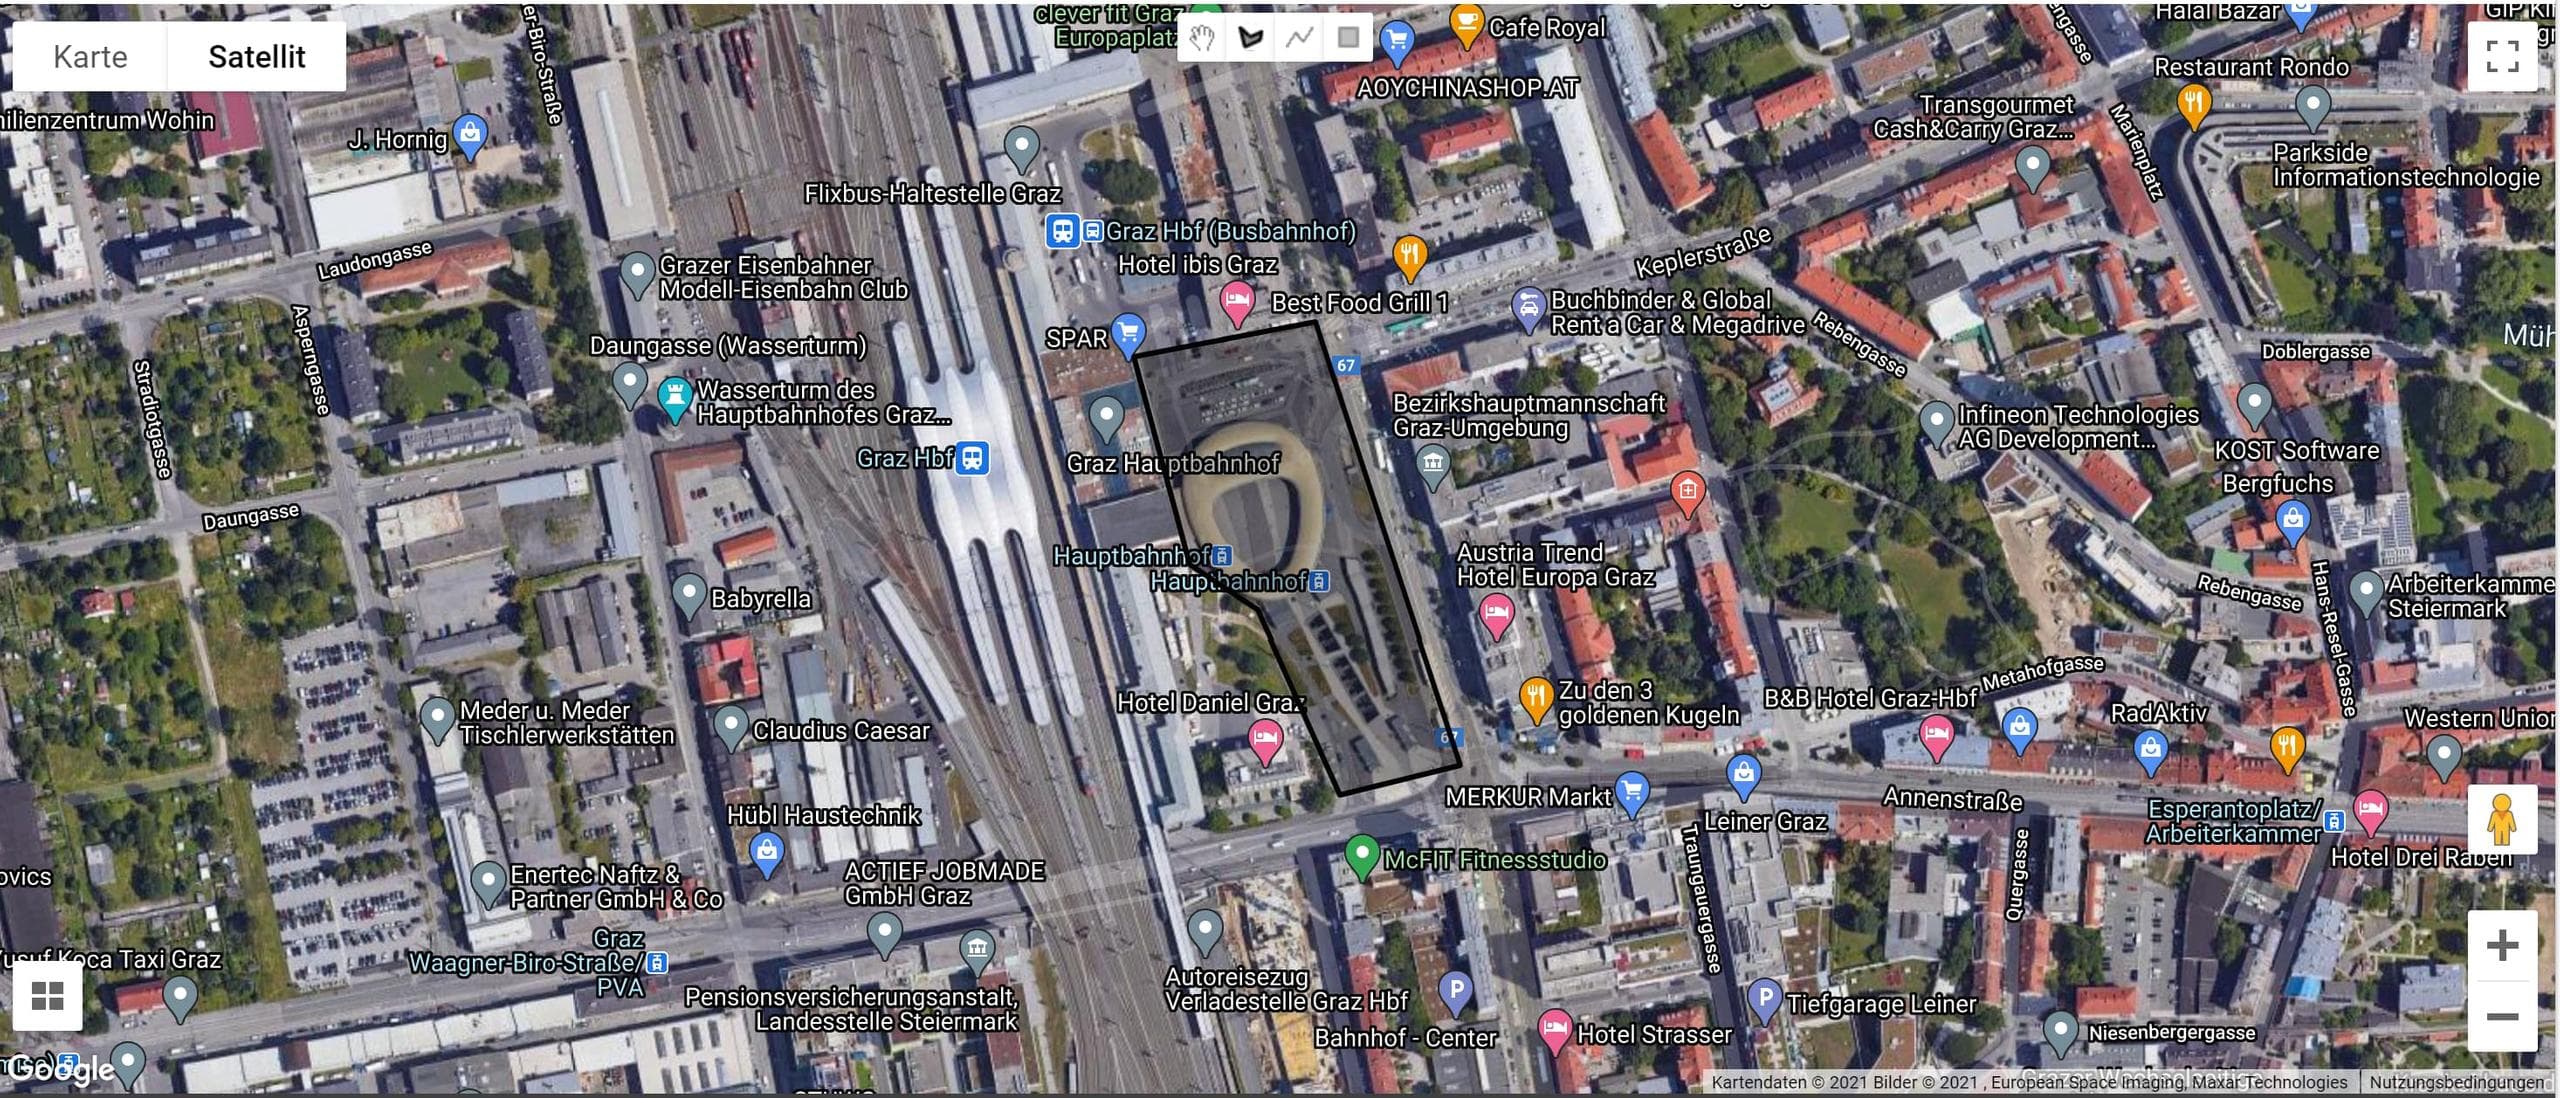
}Above I have adapted my mounted function in a way that now the drawing library will also be loaded. The drawing controls will be switched on and some will be added to the top center. In the end, you will end up having something like this integrated into your web app:
Conclusion
Integrating GoogleMaps is an easy task if done right, else it could be a time- and nerve-consuming task. By using the mentioned npm package you will save most of the time and you can focus on using the powerful API you and up with.
thanks for reading! If you want to know more about GoogleMaps or got problems or feedback for this article, just say hi, or buy me a coffee.
Happy coding,
Alex.