

In this Post, I will guide you through the steps I took when deploying a project to Netlify.
Netlify is similar to AWS another cloud service, they offer a huge free plan with up to 100GB/month of traffic. Moreover, I love them for their great user experience when it comes to deployment compared to AWS and Microsoft Azure. Bellow, I will describe all the steps it takes to get your app up and running.
Why Netlify
Netlify is a web hosting platform I trust for years. As mentioned above, they have a huge free plan and the platform has an amazing UX.
They also offer a build in CDN, which dramatically impacts your site's performance.
Just see the speed metrics of my blog to convince yourself.


Before we start
First sign in using your GitHub account or any other method, then you will come to your home Page, I will describe their elements later.
Set up a GitHub CI
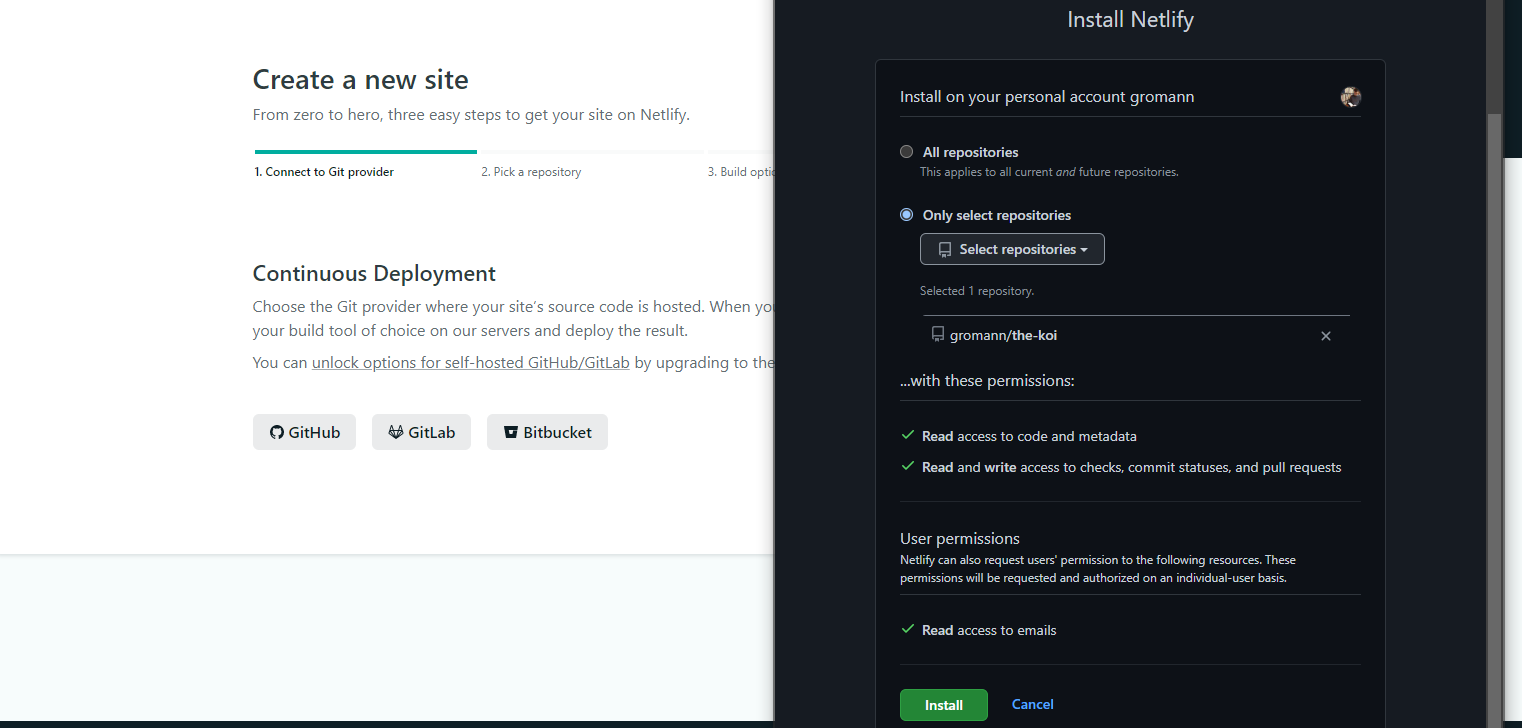
From the home menu click on create a new site and chose GitHub, authorize Netlify to your GitHub account, and then chose either all repositories or just one, as I did on the left to install Netlify.
In the next step, select the repository you want to build your site from.
In step 3 you need to specify your build settings, this highly depends on your application. When you want to deploy a Gridsome app to Netlify, your Build command is gridsome Build and the publishing directory is dist.
When you want to deploy a nuxt app to Netlify it would be nuxt generate, the directory stays the same, and with plain vue it stays npm run build. Finding these commands for every other framework is also no rocket science and is normally described in the framework's documentation.

That's it! Hit Deploy site and Netlify is doing the rest for you! Just wait a few minutes and your site is up and running. Awesome right?
How to register a domain
When the Upload is done, you can proceed with registering a domain for your Project.
You have multiple options when it comes to domain registration. There are so many platforms where you can buy and register domains. Some are cheap, some are not. I can recommend namecheap, with my link you can register a .com domain starting at $6.98! Sounds like a good deal!
Another option is to use Netlify service and simply register it there, and they handle all the DNS pain for you, but it is not as cheap as above.

I have registered my domain directly within Netlify, to complete I just had to submit my payment information and confirm my purchase. After a few seconds, https://www.the-koi.com/ was up and running!
For your SSL certificate, you just have to click on verify DNS, then everything should be fine, and you have a nice Trustful website online!
Reload after some minutes and your Domain management tab Should look something like this:

And that's it! Your Page is online, and now you could focus on your SEO and how to get traffic.
Conclusion
Deploying your code to Netlify takes really no time, and you end up having a fast and secure server to serve your content.
Compared to WordPress you are also running on a budget, your only expenses are 13€ per year for the domain, and that's it!
If you want to know more about Netlify or got feedback for this article, just say hi, or buy me a coffee.
Happy coding,
Alex.